
How to Find a Hidden Leak Before It Turns Into Mold
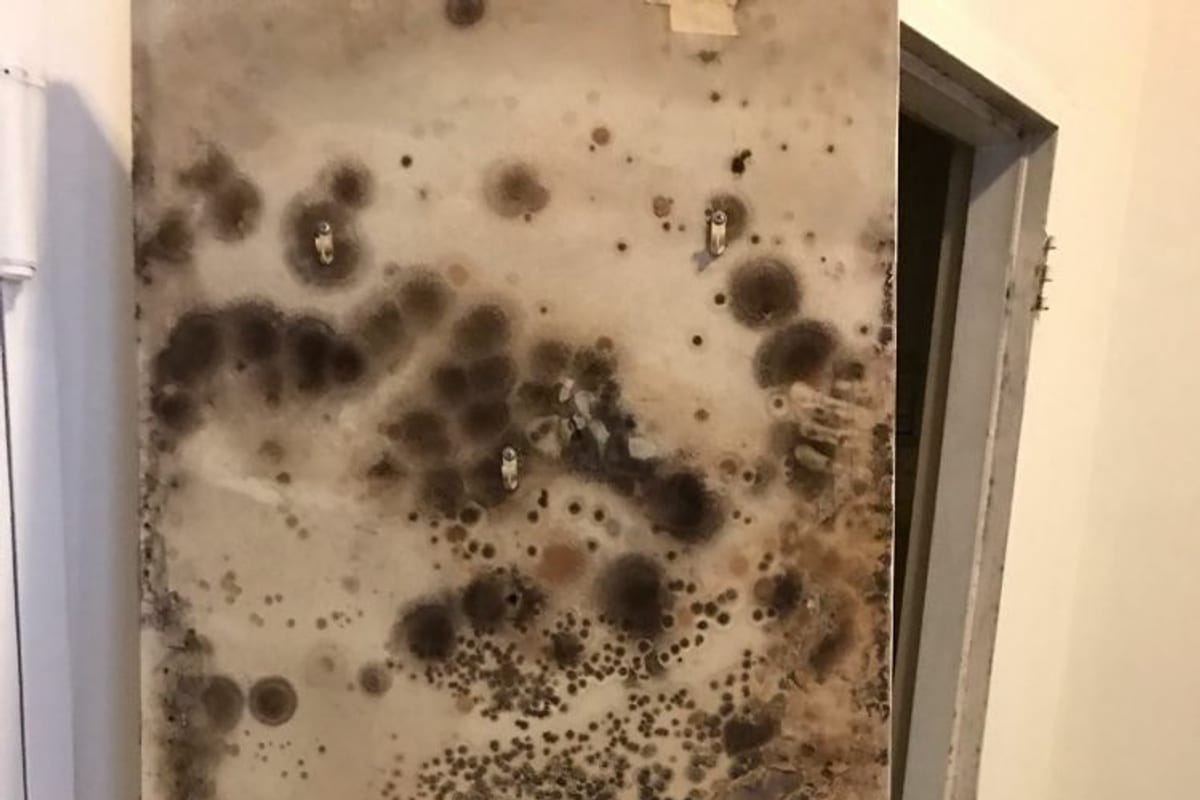
To find a hidden leak, first decide whether it is plumbing or weather: a water meter test tells you if pressurized supply pipes are leaking, and checking the attic and walls during or right after rain tells you if the roof, flashing or windows are letting water in. Once you know which system is involved, a moisture meter and a methodical search narrow it down to a specific spot.
This guide covers the water meter test, the toilet dye test, how to check fixtures and appliances, how to search the roof and attic, how moisture meters and thermal cameras help, and when to stop and call a plumber or roofer.
Hidden leaks matter for mold because the EPA notes that mold can begin growing on wet materials within 24 to 48 hours. A slow drip inside a wall can run for months before you see a stain.
Step 1: Sort the Clues
Before you start testing, think about what you have noticed and when. The pattern points to the source.
| Clue | Points toward |
|---|---|
| Water bill higher than usual with no change in use | Supply plumbing or a running toilet |
| Stain that grows after rain, stays the same in dry weather | Roof, flashing, window or siding |
| Stain below a bathroom or kitchen | Drain, supply line, fixture seal or shower pan |
| Damp spot that appears only in winter | Condensation or ice dam, not a pipe |
| Damp spot that appears only in summer | Condensation on cold pipes or ducts |
| Sound of running water with everything off | Supply leak or running toilet |
| Musty smell with no visible stain | Hidden leak or long-term humidity |
Our guide to mold on the ceiling has more detail on telling roof leaks from bathroom condensation and attic problems.
Step 2: The Water Meter Test
The water meter test is the fastest way to find out whether pressurized supply plumbing is leaking somewhere. It works for homes on public water. For a private well, see the note below.
- Turn off every water-using fixture and appliance. That includes faucets, the dishwasher, the washing machine, ice makers, irrigation, water softener regeneration and the humidifier on the furnace.
- Find the water meter. It is often in the basement where the main line enters, or in a pit near the street.
- Look for the leak indicator. Many meters have a small triangle, star or dial that spins with even tiny flows. If it is moving with everything off, water is flowing somewhere.
- Write down the full meter reading and take a photo.
- Wait 1 to 2 hours without using any water. Do not flush.
- Read the meter again. If the number changed, there is a leak.
Narrow it down
If your house has a main shutoff valve inside, past the meter:
- Close the main shutoff.
- If the meter still moves, the leak is between the meter and the house, often the underground service line.
- If the meter stops, the leak is inside the house.
Then you can shut off individual fixture valves, such as under sinks and behind toilets, to narrow it further.
Private wells
On a well system, watch the pressure tank gauge and listen for the pump. With all water use off, a pump that cycles on every so often means water is leaving the system. Note the pressure, wait an hour, and look again.
Step 3: The Toilet Dye Test
A running toilet is the most common silent leak, and it usually does not damage anything because the water goes down the drain. It still raises the bill and can mislead a meter test, so rule it out.
- Take the lid off the tank.
- Add a few drops of food coloring to the tank water.
- Do not flush for 15 to 30 minutes.
- Look in the bowl. If colored water has appeared, the flapper or flush valve is leaking.
A leaking flapper is usually a cheap fix. A leak at the toilet base is a different problem. If the floor around the toilet is soft, stained or cracked, or the ceiling below has a stain, the wax ring seal may be failing. That kind of leak does wet the subfloor. See mold on floor joists and subfloor.
Step 4: Check Fixtures and Appliances
Most hidden plumbing leaks start at a connection. Work through these with a flashlight and a dry paper towel. Wipe each joint, then look for dampness on the towel.
- Sink supply lines and shutoff valves, especially braided lines and older compression fittings.
- Sink drains and P-traps. These only leak when water runs, so fill the sink and drain it while watching. Our guide to mold under the kitchen sink covers sink cabinets in detail.
- Dishwasher supply and drain lines.
- Refrigerator ice maker line, often a thin plastic or copper tube behind the fridge.
- Washing machine hoses. Rubber hoses crack with age.
- Water heater fittings, the relief valve discharge pipe and the tank base.
- Tub and shower. Check caulk and grout, and the access panel behind the faucet if there is one. A shower pan leak shows up in the ceiling below only when the shower is used.
Step 5: Roof and Attic Checks
Roof leaks are best found during or right after a steady rain, from the attic, with a flashlight. Water often enters at one spot and runs along rafters or sheathing before dripping, so the ceiling stain can be several feet from the actual hole.
- Go into the attic during or shortly after rain. Step only on joists or a walkway.
- Look at the underside of the roof sheathing above the stain. Follow any wet lines uphill.
- Check where something passes through the roof: plumbing vent pipes, chimneys, skylights, exhaust fans.
- Check valleys and the transition where a lower roof meets a wall.
- Look for daylight, rusted nails and dark rings on sheathing.
Common culprits are cracked rubber boots around plumbing vents, failed chimney flashing, and missing or lifted shingles.
In winter, two other problems can look like roof leaks:
- Ice dams form when heat melts snow on the upper roof and the water refreezes at the cold eaves. Water backs up under shingles.
- Attic condensation forms when warm, moist house air leaks into a cold attic and condenses on the sheathing. A bathroom fan venting into the attic is a common cause. See bathroom fan venting into the attic.
Step 6: Use a Moisture Meter
Once you know the general area, a moisture meter tells you which surfaces are actually wet.
- Take a baseline reading on a wall or floor you know is dry, made of the same material.
- Scan outward from the stain in a grid.
- Mark high readings with painter’s tape.
- Repeat after using the nearby fixture, or after rain.
A spot that gets wetter after use or rain is near the source. Our guide to moisture meter readings explains pin and pinless meters and what the numbers mean.
Step 7: Thermal Imaging
A thermal camera shows surface temperature differences. Wet materials are often cooler than dry ones because evaporation pulls heat away. Hot water leaks can show up as warm streaks.
A thermal camera does not see water or mold, and it does not see through walls. It shows patterns that suggest where to take moisture readings. Insulation gaps, studs and air leaks can all look like wet spots. Always confirm a thermal anomaly with a moisture meter before cutting anything.
Thermal cameras work best when there is a temperature difference between inside and outside, or after hot water has run through the pipes.
When to Call a Plumber, Roofer or Inspector
Stop searching and call a professional when:
- The meter test shows a leak but you cannot find it at any fixture. A plumber can pressure test individual lines or use acoustic leak detection.
- You suspect the underground service line or a slab leak.
- Water is coming through a ceiling light fixture or near wiring. Shut off that circuit.
- The roof is steep, wet or hard to reach safely.
- You have found the leak but there is staining, soft drywall or a musty smell, which suggests mold behind the surface. See signs of mold behind drywall.
What to Do After You Find It
- Stop the water. Close the fixture shutoff or the main.
- Photograph everything before you clean or repair. Insurance claims rely on documentation. Coverage varies by policy. This is general information, not legal advice. Read your policy, and see does homeowners insurance cover mold.
- Dry the area within 24 to 48 hours if possible. Our first 48 hours after water damage guide covers drying steps.
- Fix the leak properly before closing anything up.
- Recheck moisture readings after a few days of drying.
The EPA’s Brief Guide to Mold, Moisture and Your Home stresses the same order: fix the water problem, dry materials, then clean or remove what grew mold. The EPA’s WaterSense program also has homeowner tips on finding and fixing household leaks.
Frequently Asked Questions
How do I know if I have a leak inside a wall?
Common signs are a stain or bubbling paint that grows, baseboards that swell or separate, a musty smell in one area, a higher water bill, and a moisture meter reading that is higher in one spot than nearby areas of the same wall. A meter test tells you whether supply plumbing is involved.
Will a leak always raise my water bill?
No. Drain leaks only leak when water is running, so they use very little water but can still soak framing. Roof and window leaks do not affect the bill at all. A normal bill does not rule out a leak.
Can I find a leak with a thermal camera from the hardware store?
Inexpensive thermal cameras and phone attachments can help spot temperature patterns. They do not see water directly. Use them to decide where to check with a moisture meter, not as proof by themselves.
How long can a hidden leak go before mold grows?
Mold can start growing within 24 to 48 hours once materials stay wet, according to the EPA. A slow leak inside a wall can keep materials wet for weeks or months, which is why hidden leaks often produce more mold than a sudden flood that is dried quickly.
Get Help Finding the Source
If you have found signs of water but cannot pin down the source, or you are worried mold has already started, our mold inspection and testing service uses moisture meters and thermal imaging to trace the water path. Contact us to schedule a visit in Gettysburg or nearby communities.